 Find and Open Google Spreadsheets if it isn't already open.
In this part of the tutorial you will be creating a workbook and learning how to fill a cell or range of cells with formulas to speed data entry.
Find and Open Google Spreadsheets if it isn't already open.
Make the entries displayed below: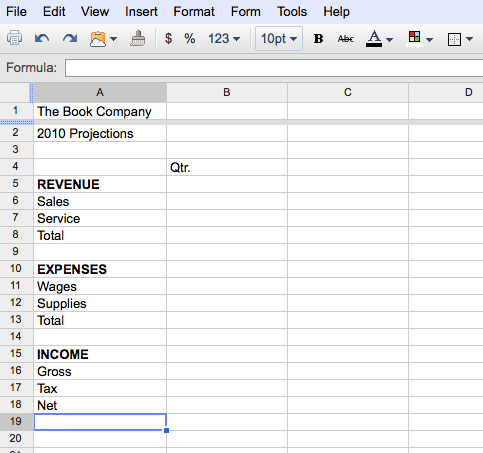
Select the text below the bold faced headings, and right justify the text.
Observe: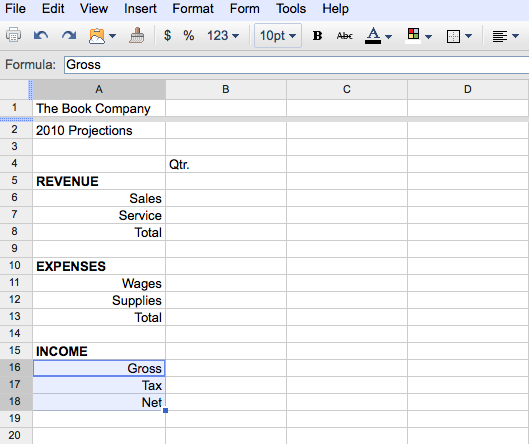
Before you enter any formulas, let's name some of the cells in your worksheet.
Speadsheets allows you to name any cell, range, or value in a workbook. You can then use this name to refer to the cell, range, or value. Names make formulas easier to read, understand, and maintain. You can change or delete names that have been defined previously. Names appear in the reference area of the formula bar when you select a named cell or range.
Select cell B6 and click on Data in the menu bar. Choose Name and protected ranges... (as shown below).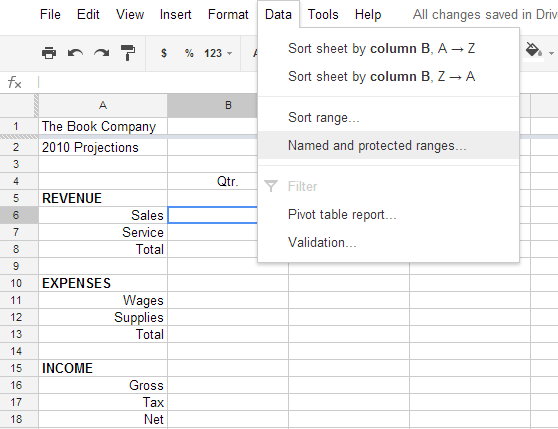
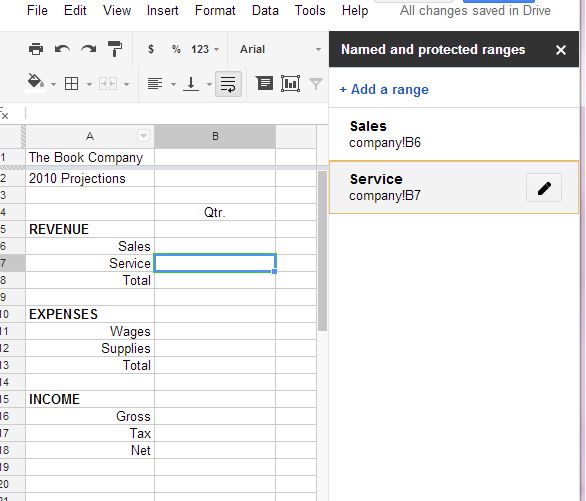
A box will appear on the right-side. Click +Add a range,type in the name: Sales where "NamedRange1" is located. Click Done.
Select cell B7 and name it: Service.
Enter the following constants into your workbook:
Select cell B8 and enter the formula that sums Sales and Services.
The formula in cell B8 should be either the formula =B6+B7 or =SUM(B6:B7). The formula is summing up the two cells directly above cell B8. If you look at cell B13, it will need a formula too. The formula in cell B13 will also sum up the two cells directly above it. This is where Spreadsheet's Copy command is useful. What you can do is copy the formula from one cell to another cell.
Rename your workbook as "company". Changes will be saved automatically.
Select cell B8.
Click the Copy icon from the Edit menu (as shown below). Spreadsheets places a marquee around the cell.
Select cell B13 and click the Paste icon (located underneath the Copy icon).
Your "company" workbook should look as follows: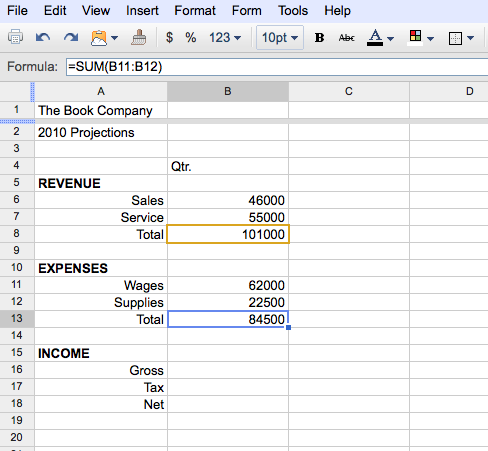
Observe that when you select cell B13, the formula =B11+B12 or =SUM(B11:B12) will appear in the formula bar. That is, the formula has summed the two cells directly above cell B13.
You now know how to copy a formula from one cell to another. Next, in order to duplicate the Qtr. heading across columns C through E, you will make a copy from one cell to several other cells.
Select cell B4 and click the Copy icon.
Highlight the range C4:E4.
Click the Paste icon.
Press the Escape key to remove the marquee.
Your "company" workbook should look as follows: 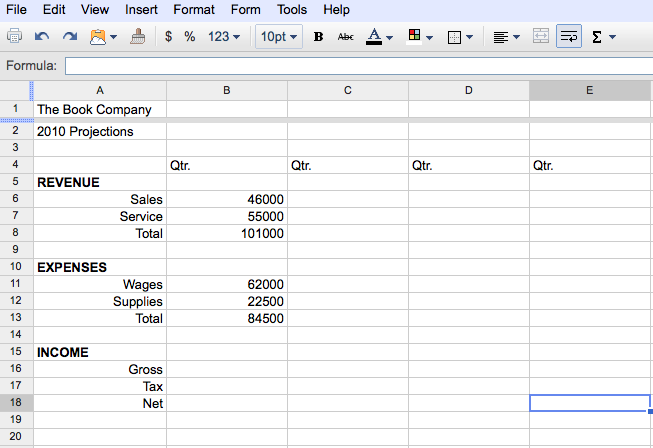
Center the Qtr. headings.
The next step is to fill in the range C6:E7 with projected revenues.
Select cell C6 and enter the formula =B6*1.08
Click the Copy icon.
Highlight the range C6:E7.
Observe: 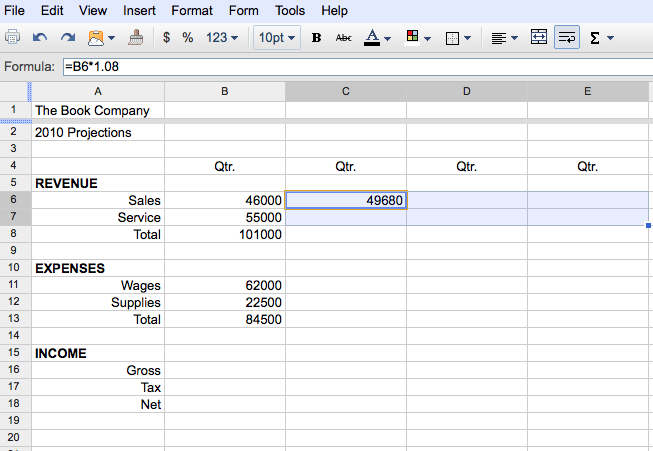
Click the Paste icon.
Your "company" workbook should look as follows: 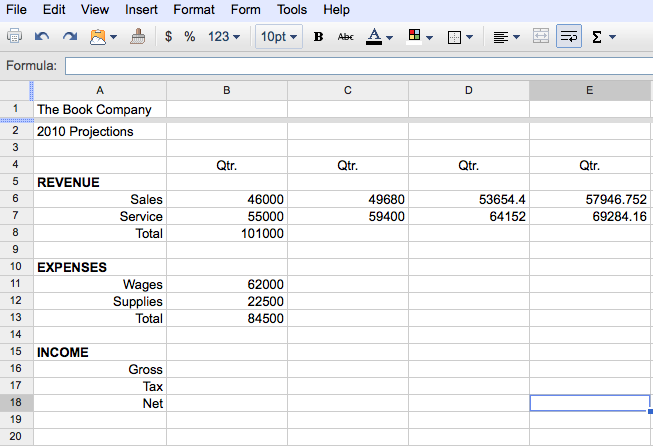
Notice that when a cell in the C6:E7 range is highlighted, the formula (which can be viewed in the formula bar) multiplies the cell directly to the left of it by 1.08.
Complete the Total row for the remaining quarters.
You can also copy data and formulas from one location on the workbook to another using the Auto Fill command.
Spreadsheets provides another means of copying text, values, or formulas from one cell to other cells. Spreadsheets provides the AutoFill command. AutoFill copies a cell's contents with out using the menu. You work directly on the workbook using the mouse or touchpad.
The AutoFill feature is used to copy formatting, formulas, or all cell contents, or to perform different types of series extensions. For example, if you type Monday and Tuesday in consecutive columns, then drag the fill handle to the right, Spreadsheets fills in Wednesday, Thursday and so on into selected cells.
The projected expenses in the range C11:E12 are computed as 1.02 times the value of the previous quarter.
Select cell C11 and enter the formula =B11*1.02. Cell C11 contains the formula that you want to copy.
Observe the fill handle located in the lower-right corner: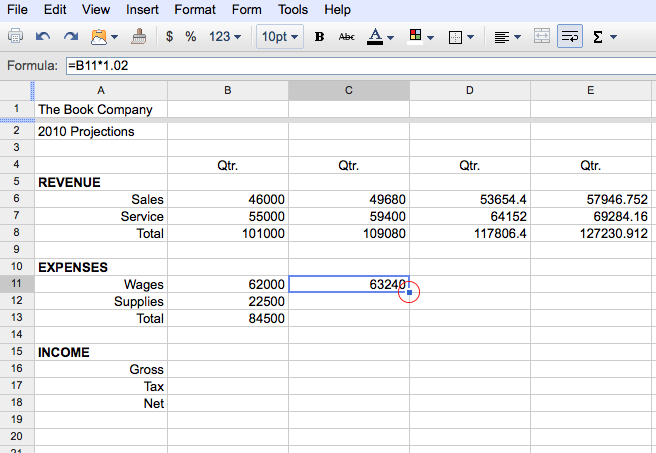
Place your mouse over the fill handle, until the arrow becomes a black cross.
Drag the fill handle across the cells D11 and E11 and then release the mouse button.
Your "company" workbook should look as follows: 
Complete cells D12:E12 and D13:E13 by using the same method.
Your "company" workbook should look as follows: 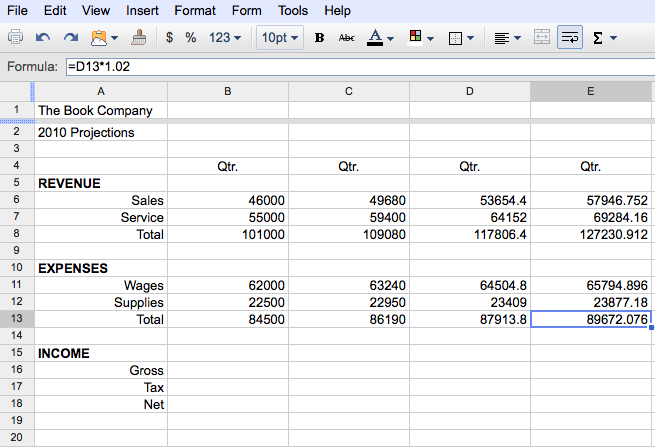
You have now learned how to copy in Spreadsheets. You may use any method above to finish the "company" workbook.
Select cell B16 and enter the formula =B8-B13 (Gross Income is equal to Total Revenue minus Total Expenses).
Select cell B17 and enter the formula =B16*.22 (The Tax is 22%).
Select cell B18 and enter the formula =B16-B17 (Net Income is Gross Income minus the Tax).
Your "company" workbook should look as follows: 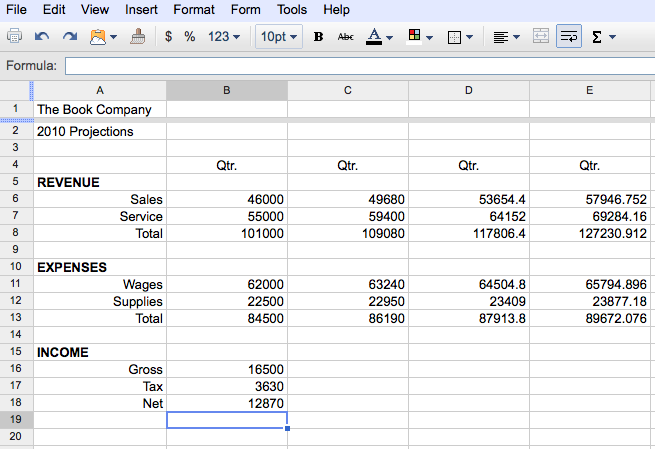
Copy the formulas in the range B16:B18 to the range C16:E18 using any method you would like.
Your "company" workbook should look as follows: 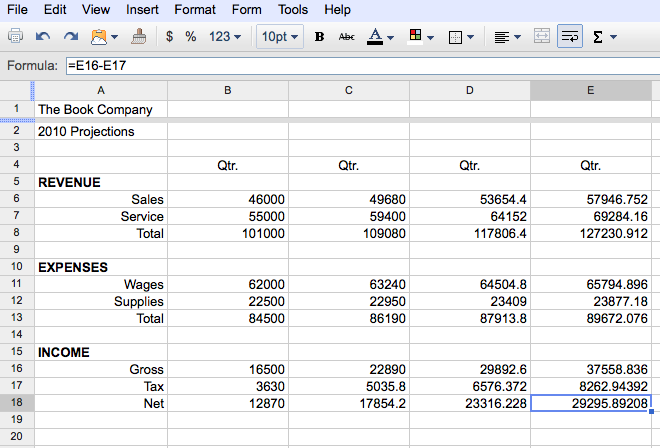
You have almost completed your "company" workbook. There is one more column to enter.
Select cell F4 and enter the text: Year then center the text.
Select cell F6 and enter the formula =SUM(B6:E6)
Copy the formula in cell F6 into the following ranges: F7:F8, F11:F13, and F16:F18.
Your completed "company" workbook should look as follows: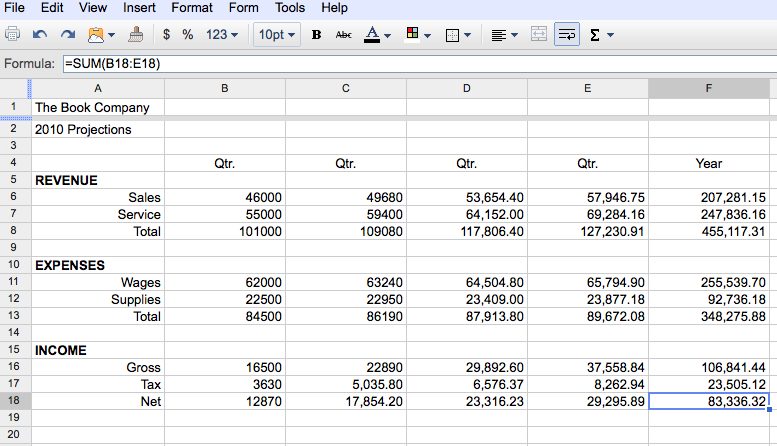
NOTE:You can change the format of the numbers to be in the Financial setting to keep the numbers after the decimal to two decimal places.
Your "company" workbook is complete. You can now use the power of Spreadsheets automatic recalculation feature. You can now use What If? analysis.
What If? analysis involves three steps:
Experiment with a What If? analysis and enter $5000 into cell B8. Observe that the Income entries are now negative.
Undo the entering of $5000 or enter $101000 in cell B8.
Now that you are done with your "company" workbook, you can learn one more of Spreadsheets advanced features: Linking.
Next Topic: Linking Worksheets
Back to Main Menu