 Go to the File menu and select New from the menu options. Select the Spreadsheets option from the side menu. A new workbook should appear.
To create a simple workbook, you need to start with a blank workbook.
Go to the File menu and select New from the menu options. Select the Spreadsheets option from the side menu. A new workbook should appear.
If necessary, resize and position the Spreadsheet window next to the tutorial.
In this tutorial, you will create a workbook to keep track of your checking account.
You will insert the dates in column A. Starting in cell A1, build the following table: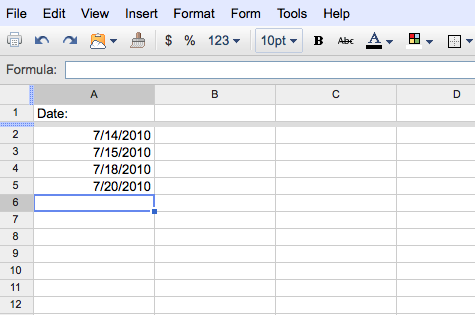
To move through your worksheet, you can use the arrow keys.
Remember to click on the Enter/Return key to enter each date.
Select cell B1 and type in the text: "Description". Observe that the text may be too large for the cell. You can change the width of the cell and as a result the whole column to fit the text.
Position your cursor between the column headings for column B and column C (as shown below)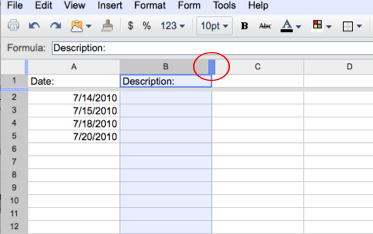 .
.
The cursor should change shape to show a double arrow as you position the cursor between the two column headings. When the cursor changes shape, you can change the width of the column by dragging to the right or left.
Click and drag to the right or left as necessary until the width of column B will fix the text. NOTE: you can simply double click in between the two column headings (while the cursor shows a double arrow) to automatically fit the column width to the text.
Fill in the data to build the following table: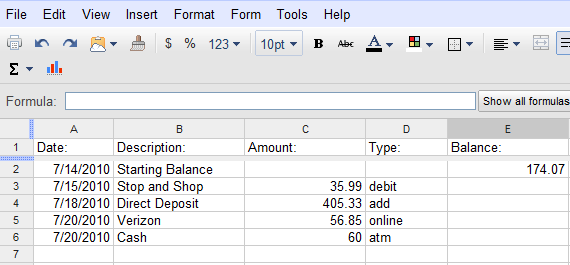
Continue to change the column widths as necessary.
Save your workbook. Choose Rename from the File Menu and name your file "checks". All changes will automatically be saved, as seen along the menu bar . If any changes are made, the text will change to "Saving... then back to "All changes saved in Drive".
Before you add more to your "checks" worksheet, you will need to learn how to write formulas using arithmetic operators and functions.
Next Topic: Writing Formulas Using Operators.
Back to Main Menu